Although WordPress is highly secure, this doesn’t mean your site is immune to issues that may cause you to lose your content when you host your website from home on a Synology NAS.
For security i have scrubbed out sensitive data.
STEP 1
First step, Load up main menu
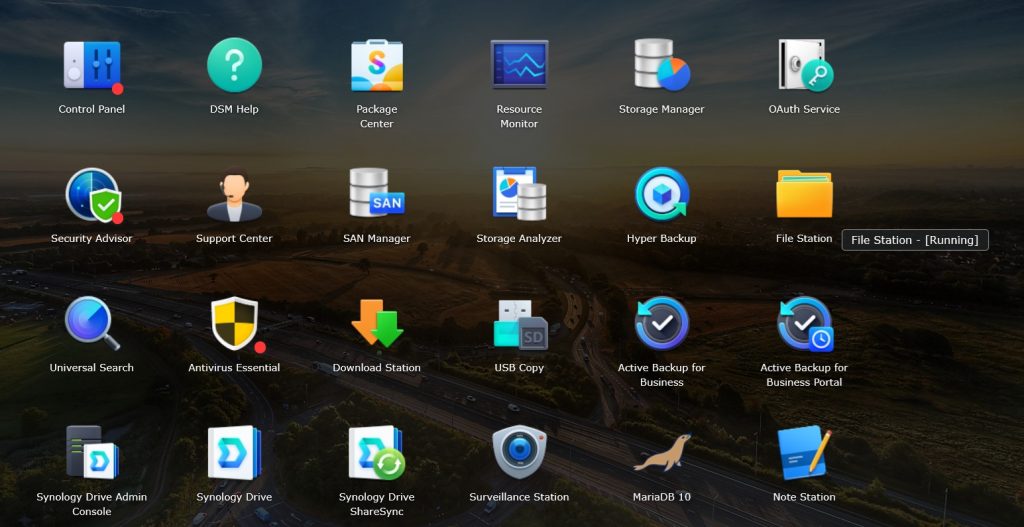
STEP 2
Second step is to select File Station through Package Center.
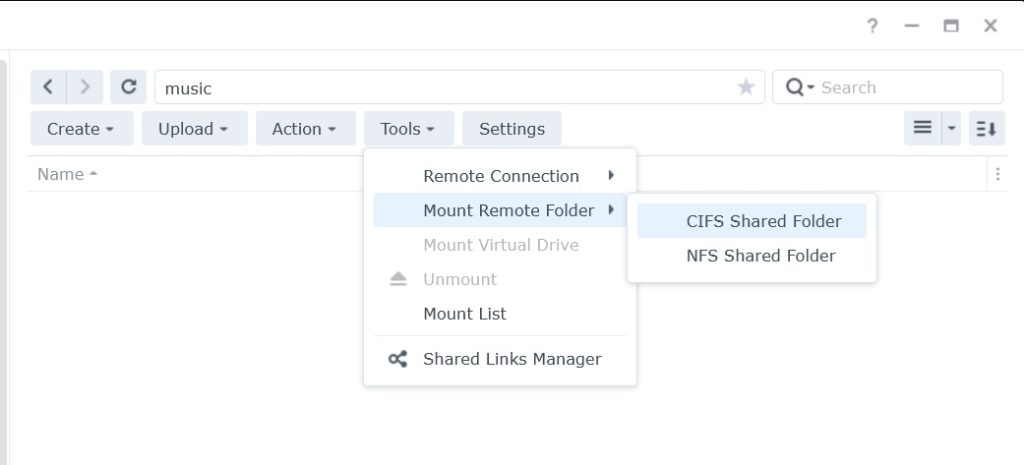
STEP 3
Click Tools > Mount Remote Folder > CIFS Shared Folder.
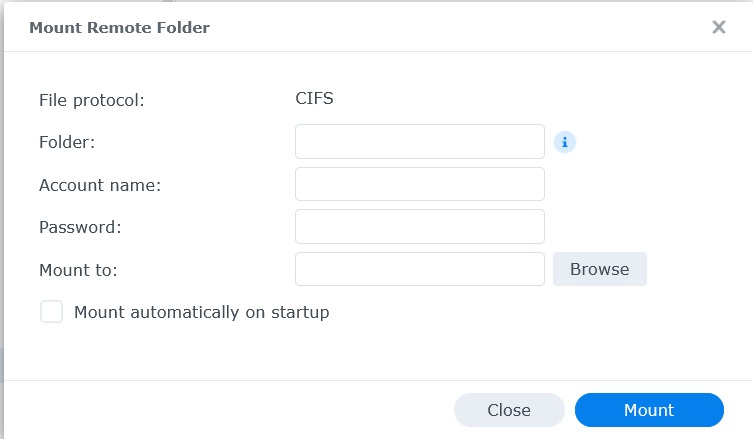
STEP 4
In the Folder field, specify the remote folder path in the format of \\Remote_Server\Remote_Folder, such as \\192.168.0.10\share or \\Pi5\Vault\pictures.
If the remote server requires access privileges to the remote folder, enter your user credentials of the remote server in the Account name and Password fields.
Click Browse to select or create an empty destination folder on your Synology NAS for mounting the remote folder.
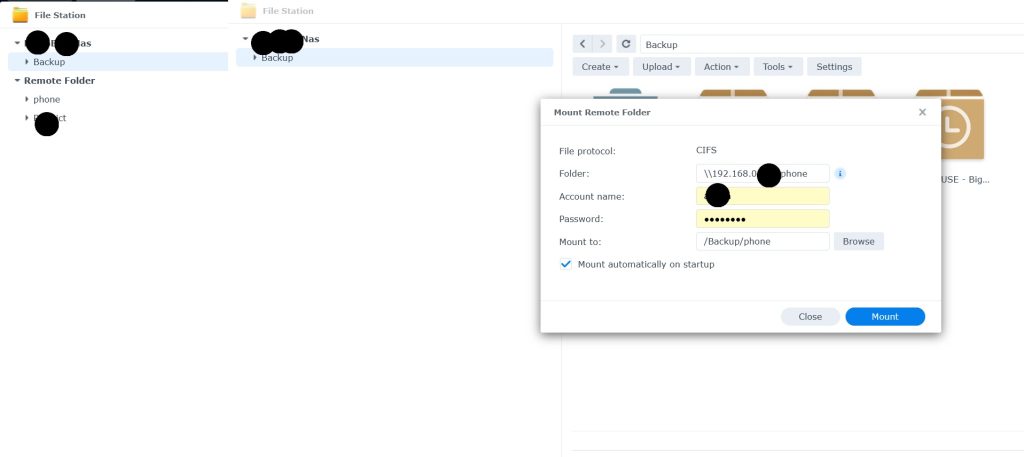
STEP 5
completed fields for remote folder, Tick Mount automatically on startup if you want Synology NAS to mount this remote folder on every system startup or reboot
Click Mount to have the remote folder mounted to the destination folder. You can now navigate and manage the remote folder from your Synology NAS.
STEP 6
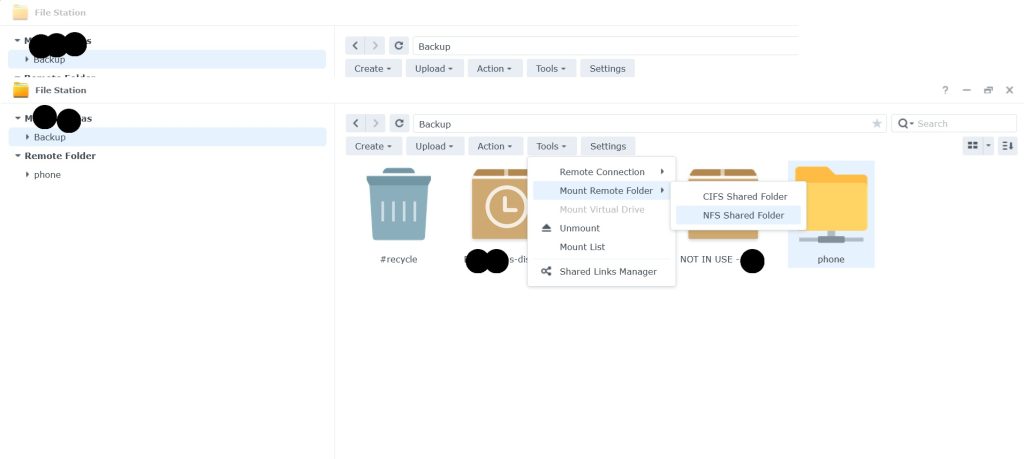
Click Tools > Mount Remote Folder > NFS Shared Folder.
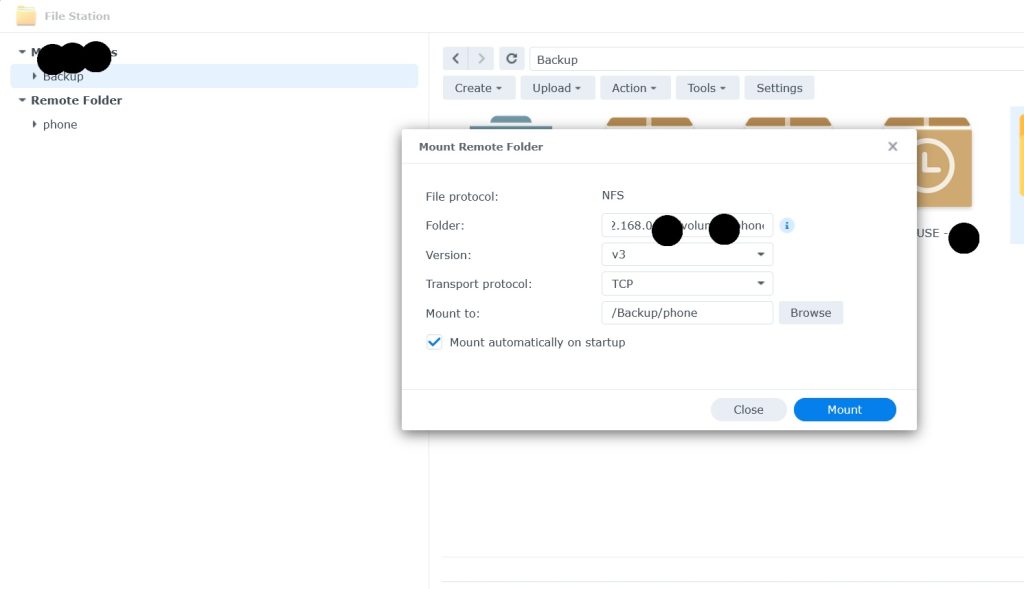
STEP 7
In the Folder field, specify the remote folder path in the format of Remote_Server:/Remote_Folder_Path, such as 192.168.0.2:/volume1/share.
Select the desired NFS version and transport protocol.
Click Browse to select or create an empty destination folder on your Synology NAS for mounting the remote folder.
Tick Mount automatically on startup if you want your Synology NAS to mount this remote folder on every system startup or reboot.
Click Mount to have the remote folder mounted to the destination folder. You can now navigate and manage the remote folder from your Synology NAS.
Note:
NFSv4 only supports the TCP protocol.
To mount a remote folder from an alternative Synology NAS to your Synology NAS, follow the steps:
Log in to the alternative Synology NAS, go to File Station, and browse to the desired folder.
Right-click on the folder and select Properties.
Go to General and copy the Location folder path for use.
STEP 8
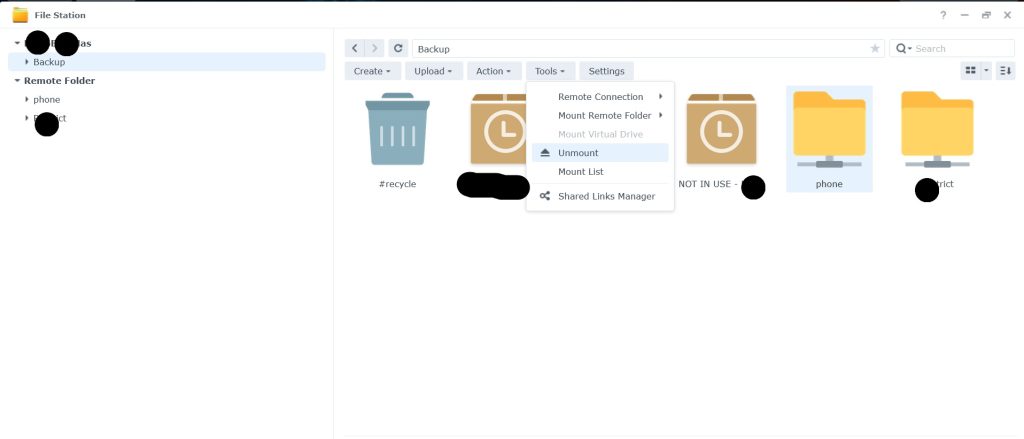
Select the remote folder you want to unmount, and click Tools > Unmount.
STEP 9
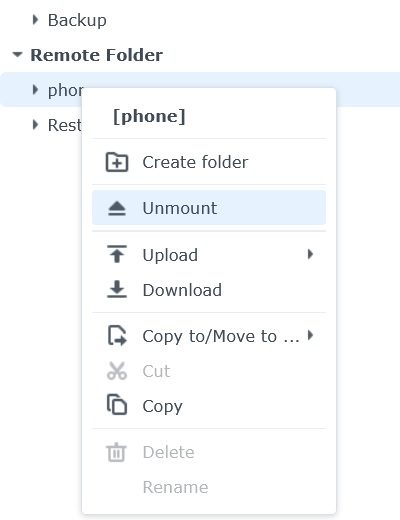
Alternatively To unmount a remote folder:
Select the remote folder you want to unmount, and click right mouse on the folder you want to unmount and select unmountTools > Unmount.
Some Side notes to make
Note: Remote folders can only be mounted to subfolders under shared folders.
Note: The maximum number of concurrent remote folders is 100.
Note: You are only allowed to mount remote folders from a remote server that supports the CIFS or the NFS protocols.